Fragments needed
2 Flashlight fragment scans
Unlock the Flashlight with two early scans: one fragment in the cave below the Lifepod, one fragment inside the northeast wreck, then return to the Fabricator and craft it. This route also notes Coral Mash, Toxic Sponge, and Mimic Pylon so the trip does not turn into a surprise hazard lesson.
Updated .
Start from distance, keep the Scanner ready, and confirm the object before swimming closer.
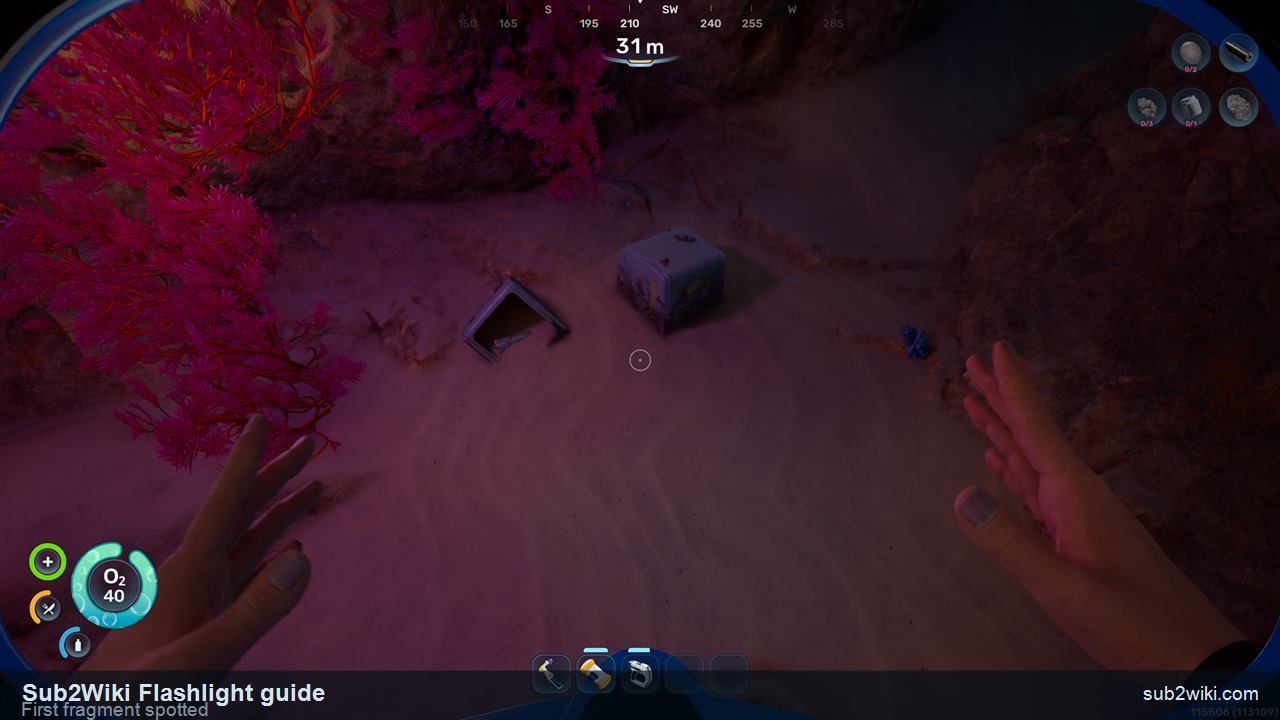
The Flashlight route starts after you can use the Scanner comfortably. Dive into the cave below the Lifepod and look for the first fragment from a little distance before committing to the scan. Keep the Lifepod as your return point and leave enough oxygen to back out cleanly.
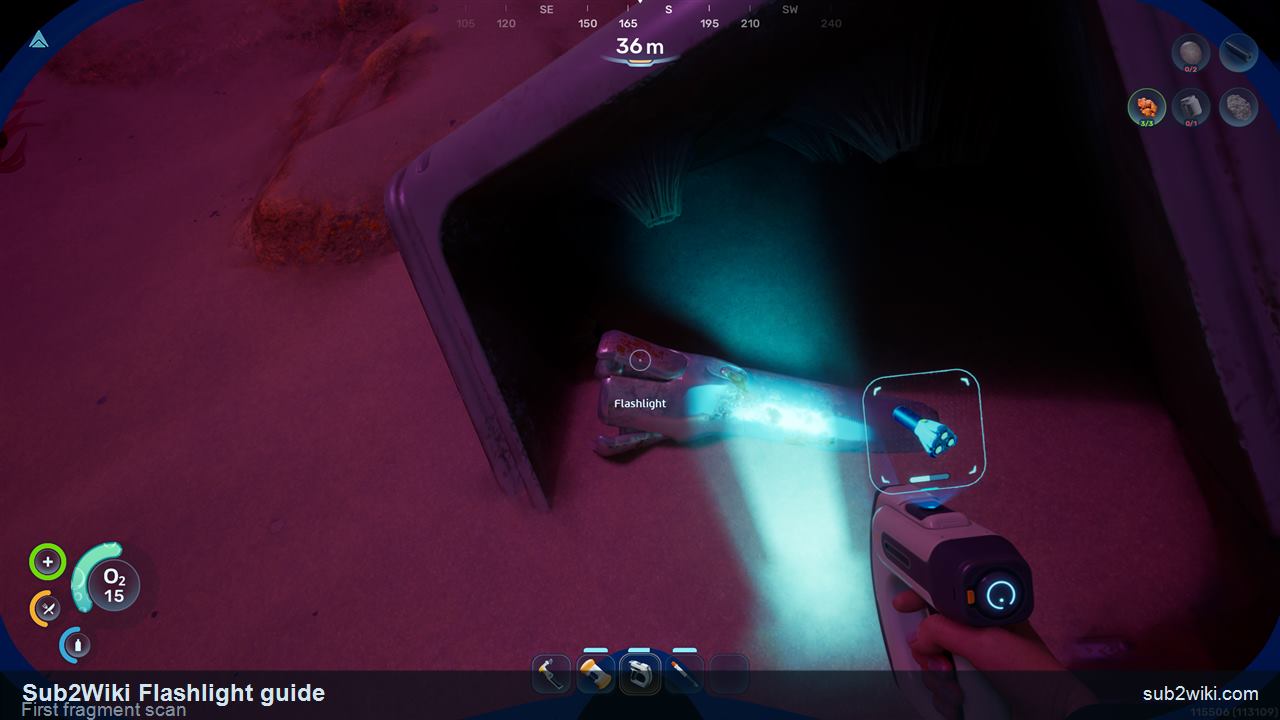
Once the object is clear, move in and complete the first Flashlight scan.
After you have the fragment lined up, swim closer, aim the Scanner at it, and hold the scan until the unlock progress advances. Back out before oxygen pressure turns the cave into a recovery problem.
Use the compass and stay shallow enough to reorient before entering the wreck.
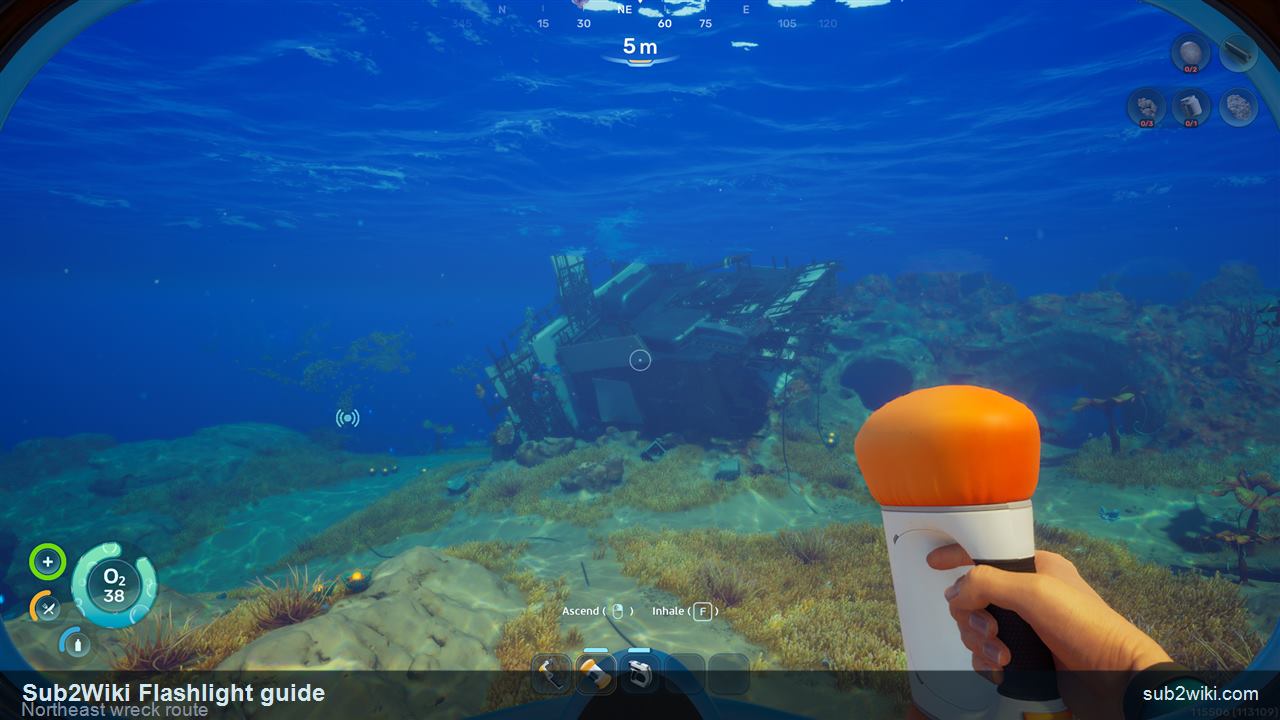
After the Lifepod cave scan, surface, face northeast, and swim toward the visible wreckage. The goal is the entrance, not every nearby material pickup. If the route gets dark or oxygen gets tight, return and reset before entering.
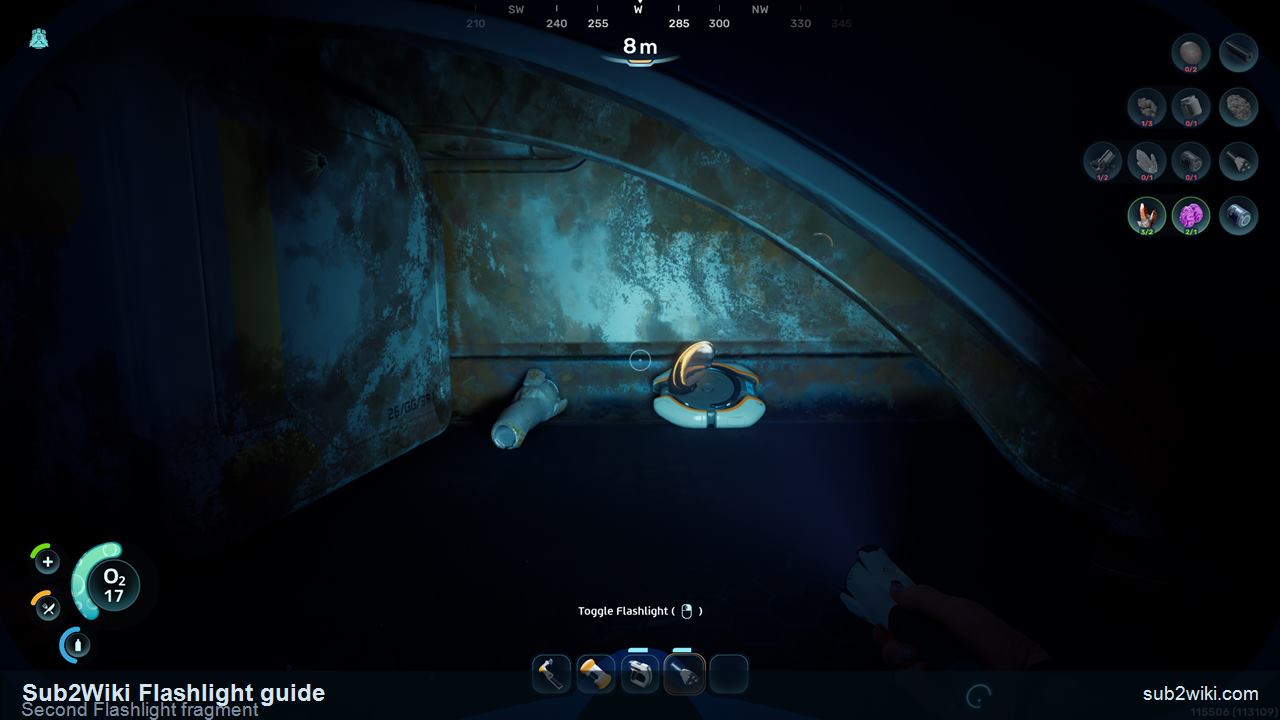
Use the entrance as your return marker before looking for the second fragment.
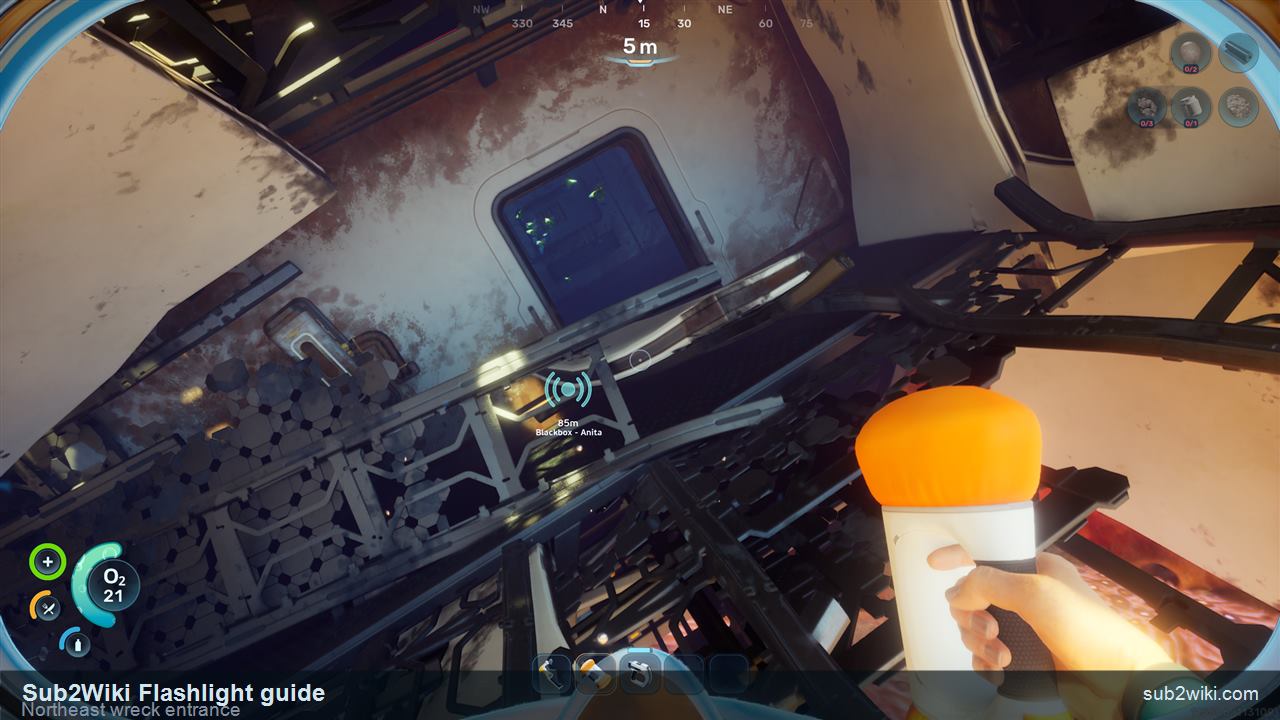
Enter the northeast wreck only while you still know the exit line. Use the entrance as your return marker, then move toward the brighter interior object area. Do not start looting side rooms before the second Flashlight fragment is handled.
This is the second unlock point before you return to the Fabricator.
Inside the wreck, move to the second Flashlight fragment location and complete the scan. Once the second scan finishes, leave the wreck and return to the Lifepod instead of stacking another objective on the same breath.
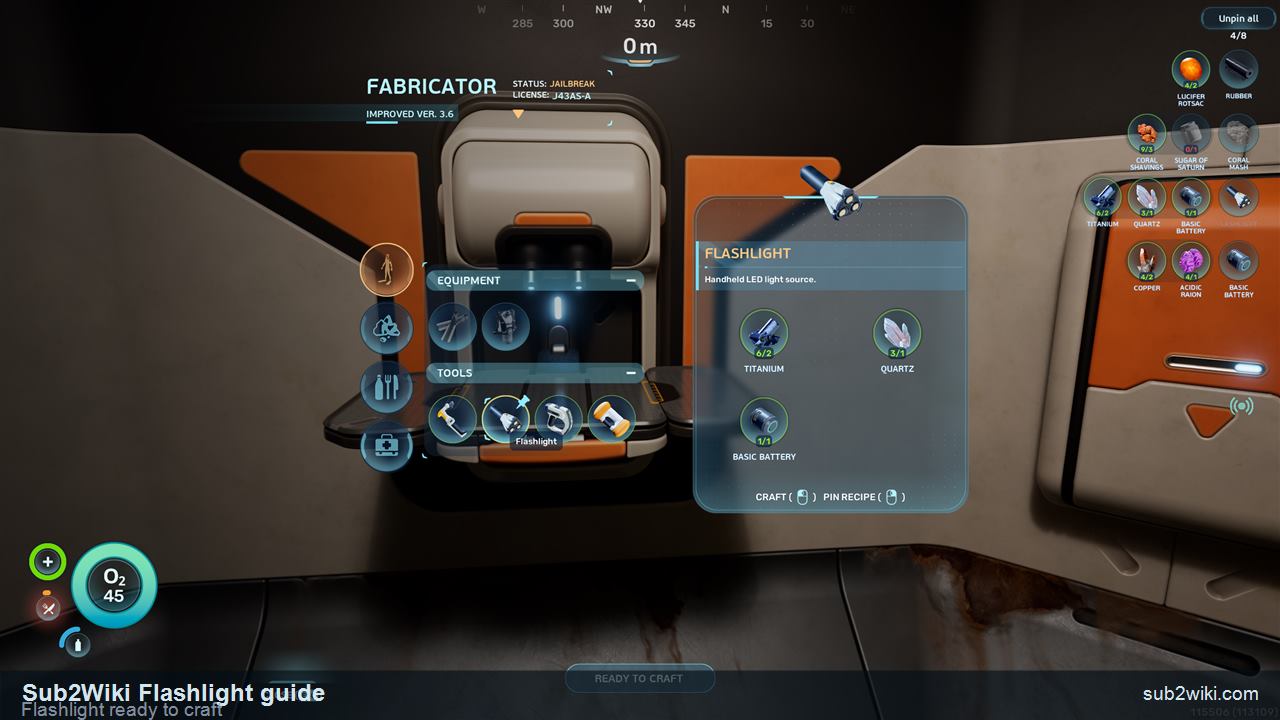
After two scans, return to the Lifepod and craft it from the visible Fabricator row.
When both fragments are scanned, go back to the Lifepod Fabricator. In this route the Flashlight row uses Titanium, Basic Battery, and Quartz, so keep battery parts and Quartz available before you swim out. Check your Fabricator row before spending the last of any starter material.
These are the useful side notes from the same play session. They belong near the Flashlight route because players can meet them while learning the starter cave and wreck rhythm.

Coral Mash can unlock on the same early route and is worth noting because it gives a strong food option once the Fabricator row appears. Use it as a food-stability step before longer wreck trips.
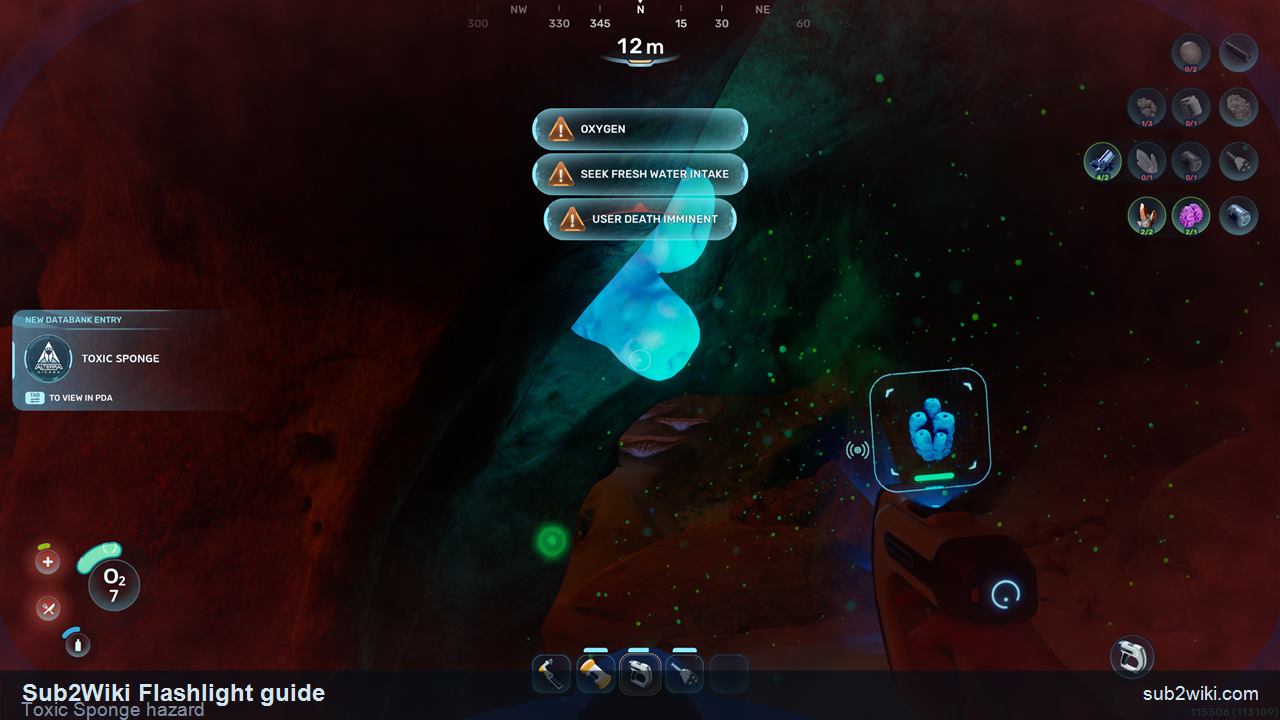
Toxic Sponge is the poisonous stationary hazard you can meet while dropping into the early cave. It releases toxic bursts with a gap between sprays, so wait for the burst, keep distance, and pass only when oxygen still looks comfortable.
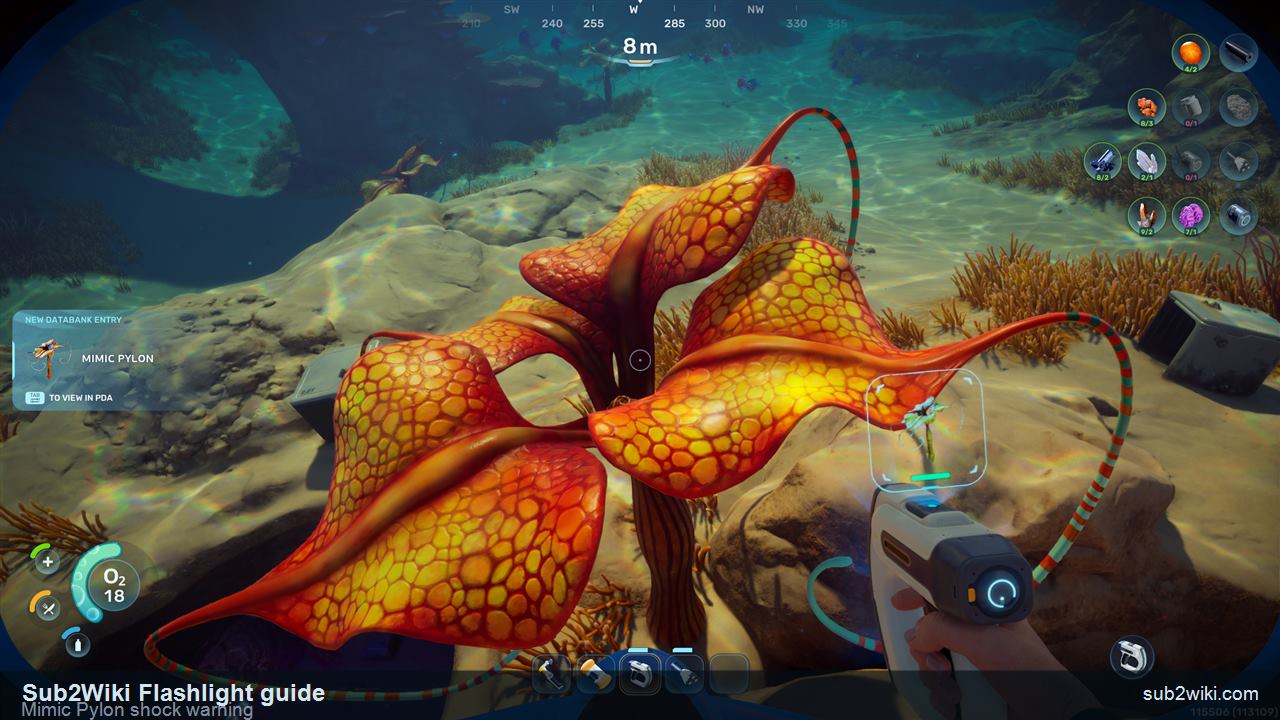
Mimic Pylon looks plant-like, but it is not harmless. Treat it as an electric lifeform: scan from distance when possible, avoid bumping into it, and do not fight it while you are already low on oxygen or health.
Do it after the Scanner and Basic Battery loop makes sense, but before repeated night dives or darker wreck entries start wasting oxygen. The Flashlight is not the first unlock in the save; it is the first visibility upgrade that makes cave and wreck exits more forgiving.
If you are still missing Water, Basic Fins, Air Bladder use, or Portable Storage, finish the First Hour route first. If those basics are stable, the two Flashlight scans are a clean next link.
You need two Flashlight fragment scans on this early route: one in the cave below the Lifepod and one inside the northeast wreck.
Start at the Lifepod, dive into the cave directly below it, go slightly deeper, and scan the Flashlight fragment there with the Scanner.
Return to the Lifepod, face northeast, swim to the wreck, enter through the visible opening, then scan the bright fragment area inside.
The early cave can include Toxic Sponge poison bursts, and later exploration can introduce Mimic Pylon, an electric lifeform. Give both space and leave with oxygen margin.
Coral Mash is a food craft that restores +65 Food once unlocked. It is useful to stabilize hunger before longer wreck or cave trips.
Build the Scanner, Basic Battery plan, water loop, and oxygen habits first.
Item page for visibility use, recipe planning, and battery tradeoffs.
The tool required to unlock both Flashlight fragments.
Power part used by the early handheld tool chain.
Coral Mash, Toxic Sponge, Mimic Pylon, and other plant-like route notes.
Fauna, flora, hazards, and scan entries grouped together.