Prologue
Finish the opening route first
Clear the prologue before starting this plan: open the PDA, use NOA, restore O2, pick up the Aid Kit and Water, make the first dive, assign the biological bed, release the stuck escape pod, and press Launch.
This route starts right after NOA Launch. The goal is simple: orient at the surface, secure the starter supplies, read NOA, pin the basic tool recipes, make a short Titanium / Quartz dive, craft your first Survival Multitool, collect nearby Fibrous Pulp, make Rubber and Fiber, craft Basic Fins, use Scanner, turn Water Slug into Water, learn Air Bladder oxygen, then stabilize storage and powered tools.
Written from our own PC survival route. Last updated 2026-06-08.
Clear the prologue before starting this plan: open the PDA, use NOA, restore O2, pick up the Aid Kit and Water, make the first dive, assign the biological bed, release the stuck escape pod, and press Launch.
Do not swim off immediately. Use the World Tree and compass as your first landmark, open the storage locker, check the Fabricator, read NOA, then pin the basic tool recipes in PDA -> Blueprints.
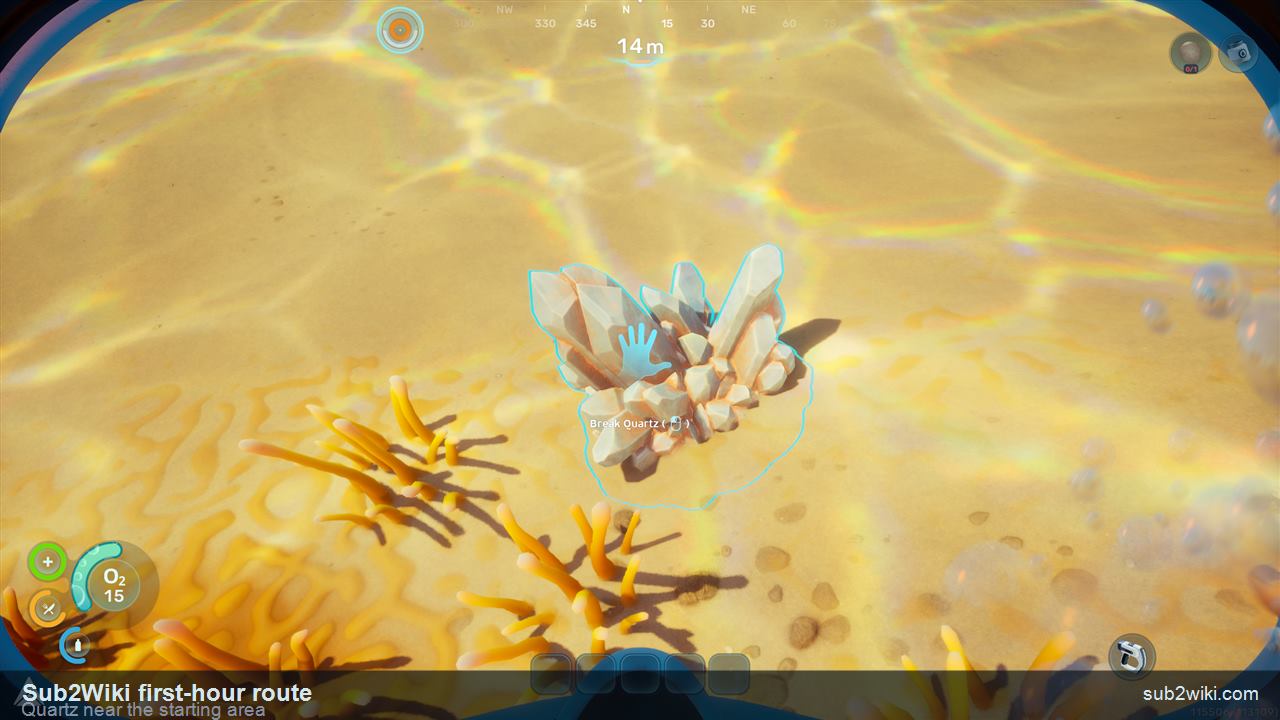
Manual save, dive briefly, pick up nearby Titanium and Quartz, and return before oxygen pressure turns the route into a recovery problem. The goal is not distance yet; it is getting the first tool materials home.
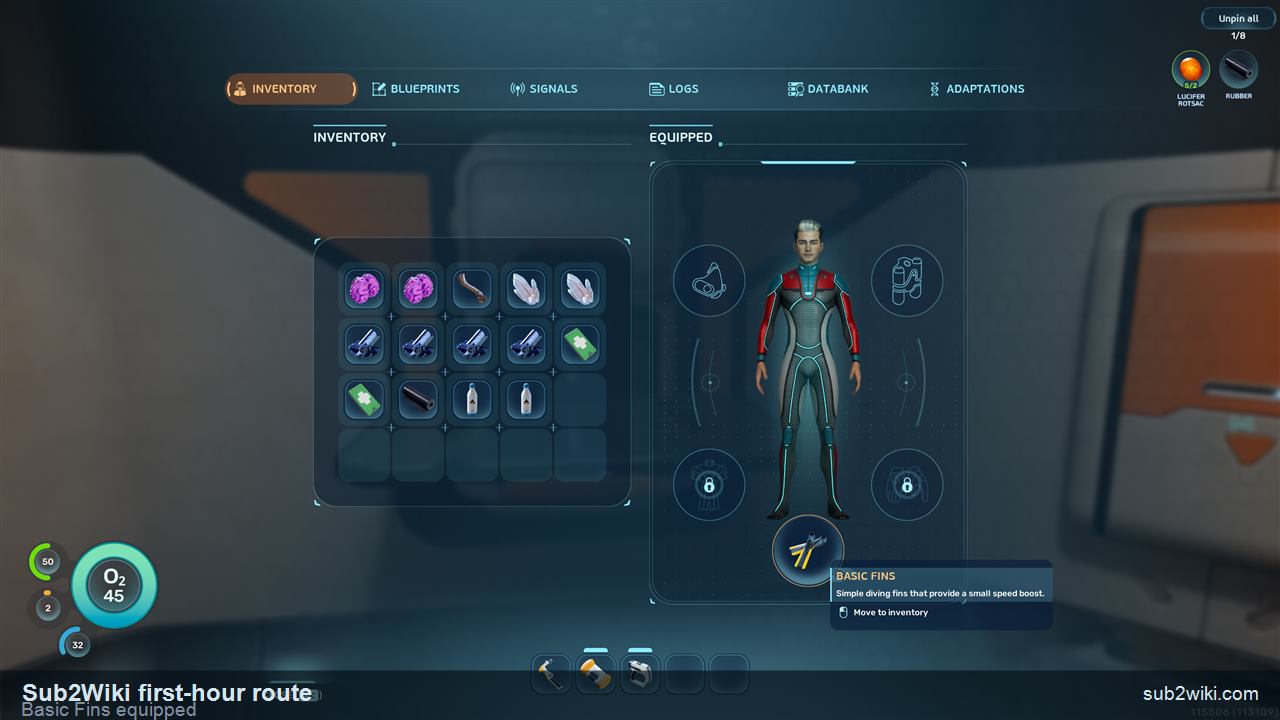
With the Survival Multitool made, keep the Lifepod / Fabricator as your return point, collect Fibrous Pulp, then craft Rubber from Lucifer Rotsac, Fiber from Fibrous Pulp, and Basic Fins from Rubber plus Fiber.
Use the Scanner during a short loop, catch a Water Slug, craft Water, practice Air Bladder F oxygen and right-click ascent, then make Portable Storage and Basic Battery before stretching the route.
Keep this list nearby while you work through the first hour. These are the early materials, tools, and survival items that turn the opening route from "where do I go?" into a repeatable gather, craft, return loop.
Nearby starter material for the Survival Multitool and early construction chain.
Nearby starter resource that belongs in the same pinned Blueprint pass.
Gather it near the Lifepod and check nearby living harvest sources before swimming farther out.
Used in the Basic Battery route and early powered-tool planning.
Biological material for the Basic Battery route. Older notes may call it Acid Rain Pouch.
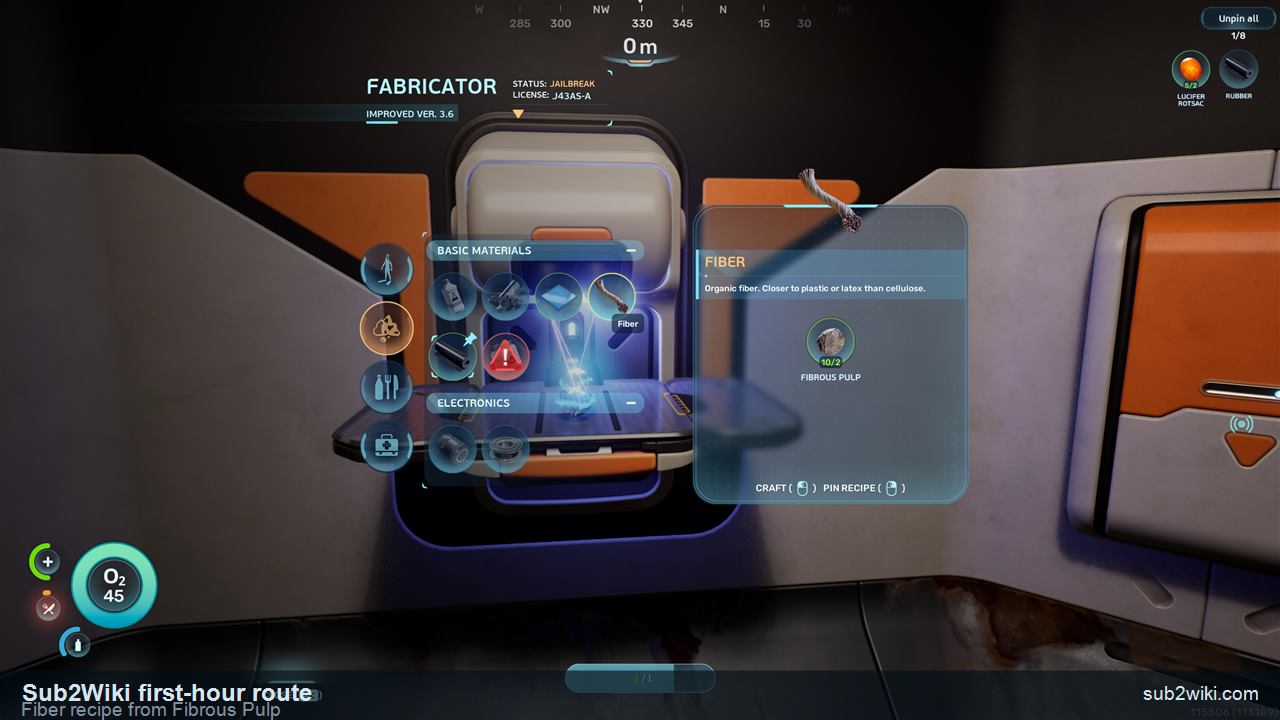
Craft Fiber from Fibrous Pulp before making Basic Fins.
Gather it for Rubber before opening the Basic Fins row.
Craft Rubber from Lucifer Rotsac for Basic Fins.
Craft them from Rubber and Fiber, then equip them for the swim speed boost.
Use it during the same short loop instead of turning the route into a long dive.
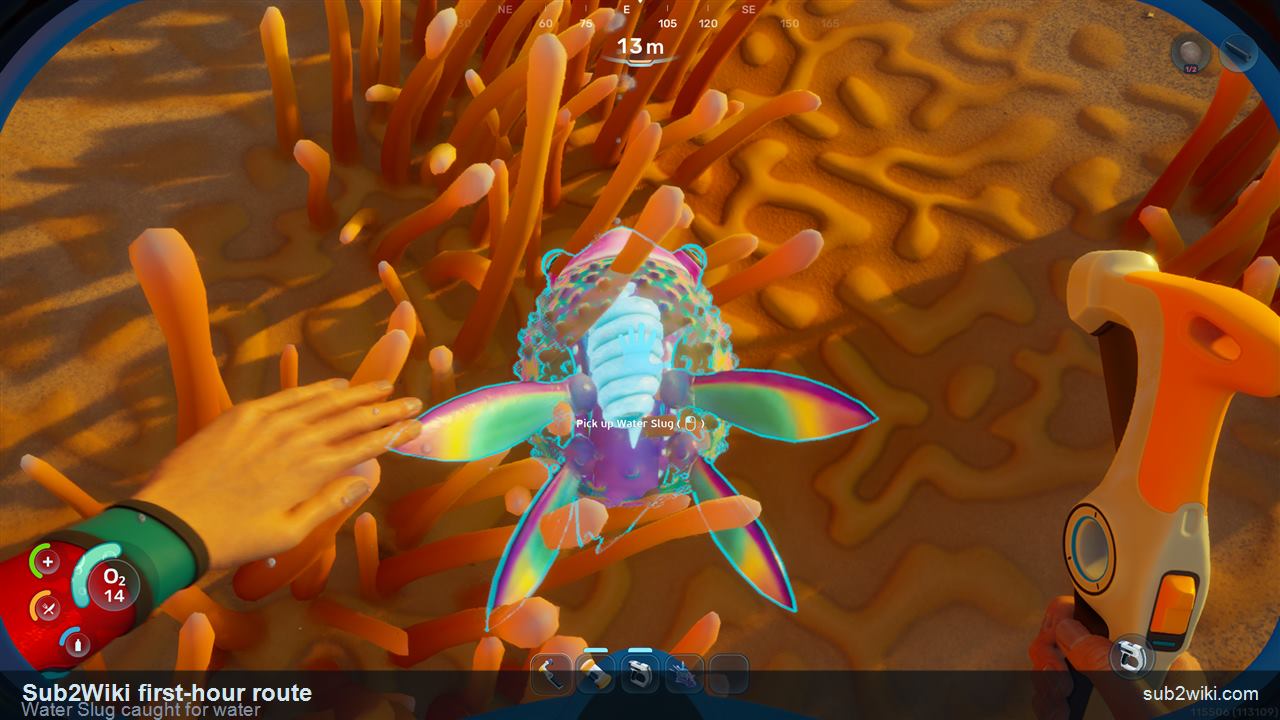
Catch one during the starter loop and turn it into Water at the Fabricator.
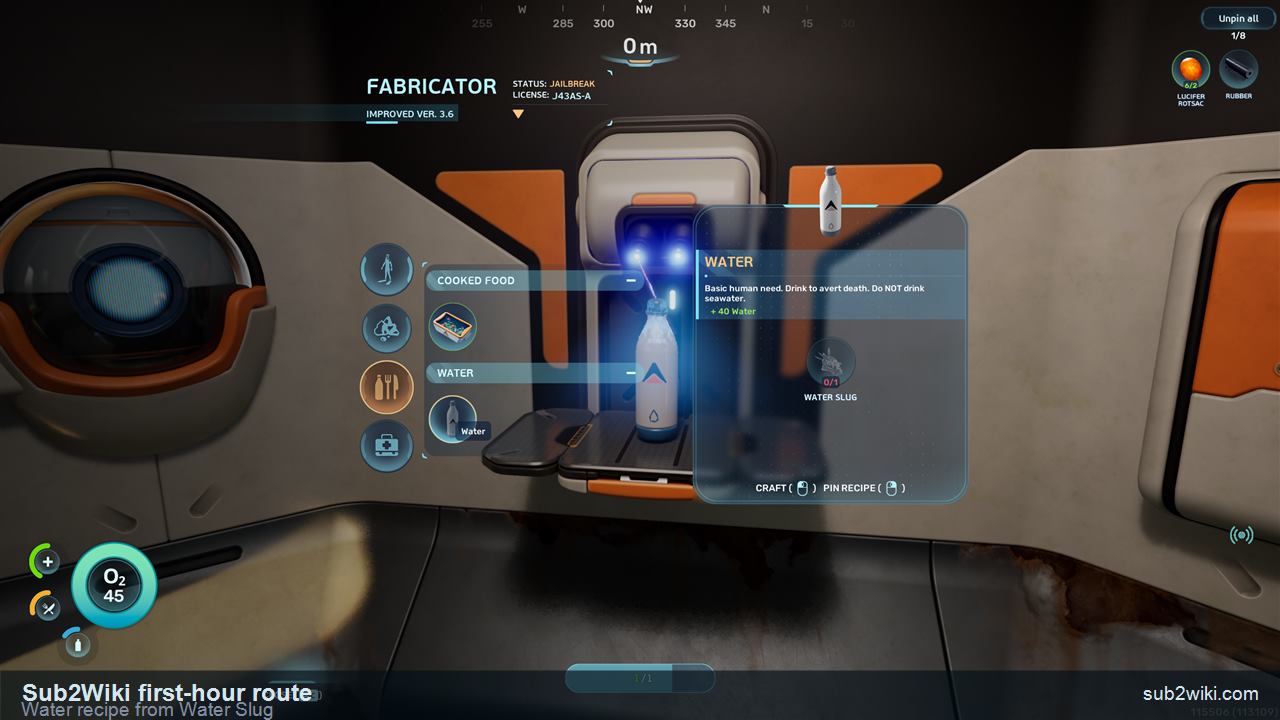
Craft Water from Water Slug to stabilize hydration before longer dives.
Press F underwater to inhale from it, then surface to refill the stored oxygen.
Plan around it after the Fibrous Pulp and Fiber steps are understood.
Useful to remember for later first-aid crafting checks.
Starter medical planning item for recovery after early mistakes.
Later medical upgrade to keep separate from the starter Aid Kit.
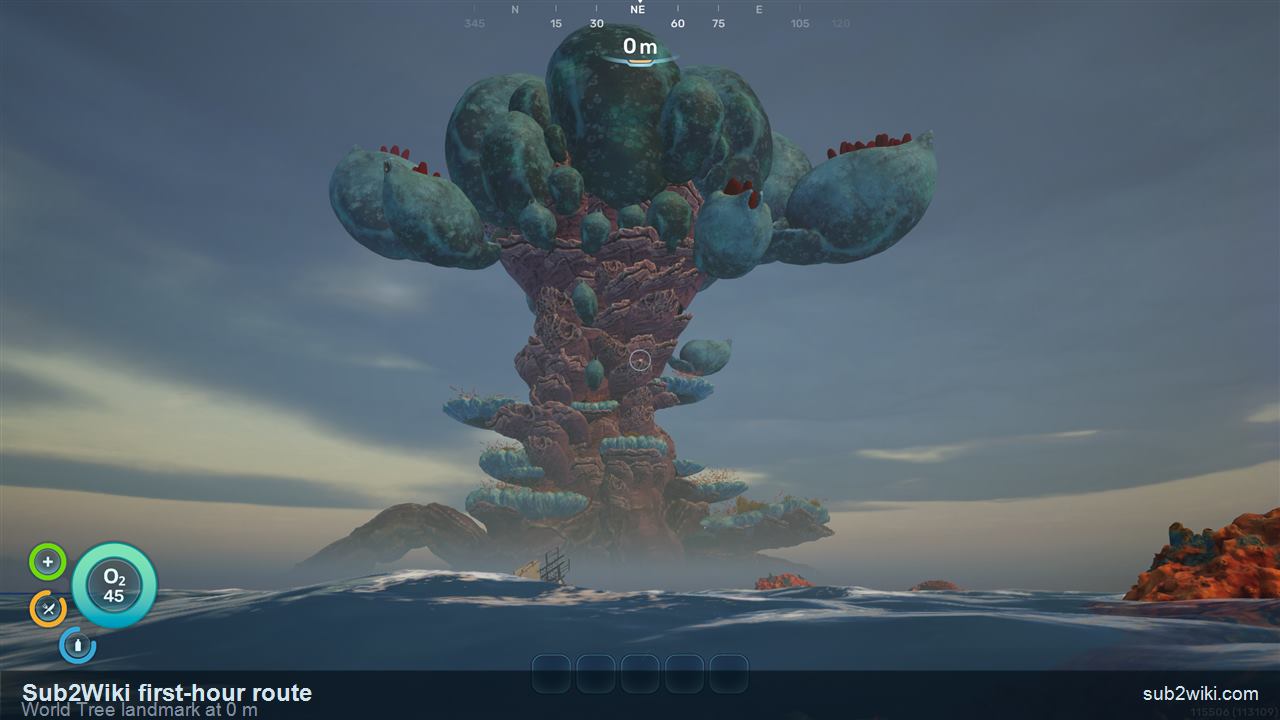
After the prologue Launch, pause before swimming away. Treat the huge planet-side landmark as the World Tree and use the built-in compass at the top of the HUD as your first direction reference. This gives you a repeatable landmark before oxygen, currents, and curiosity start pulling you around.
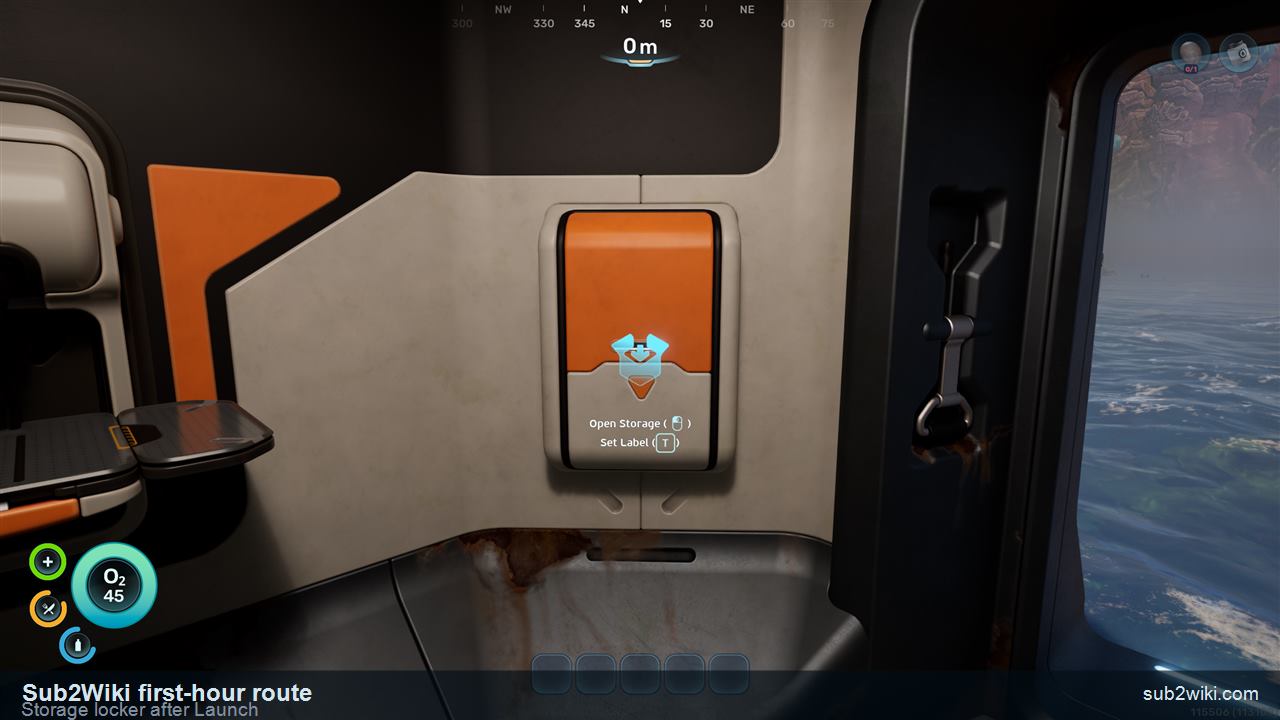
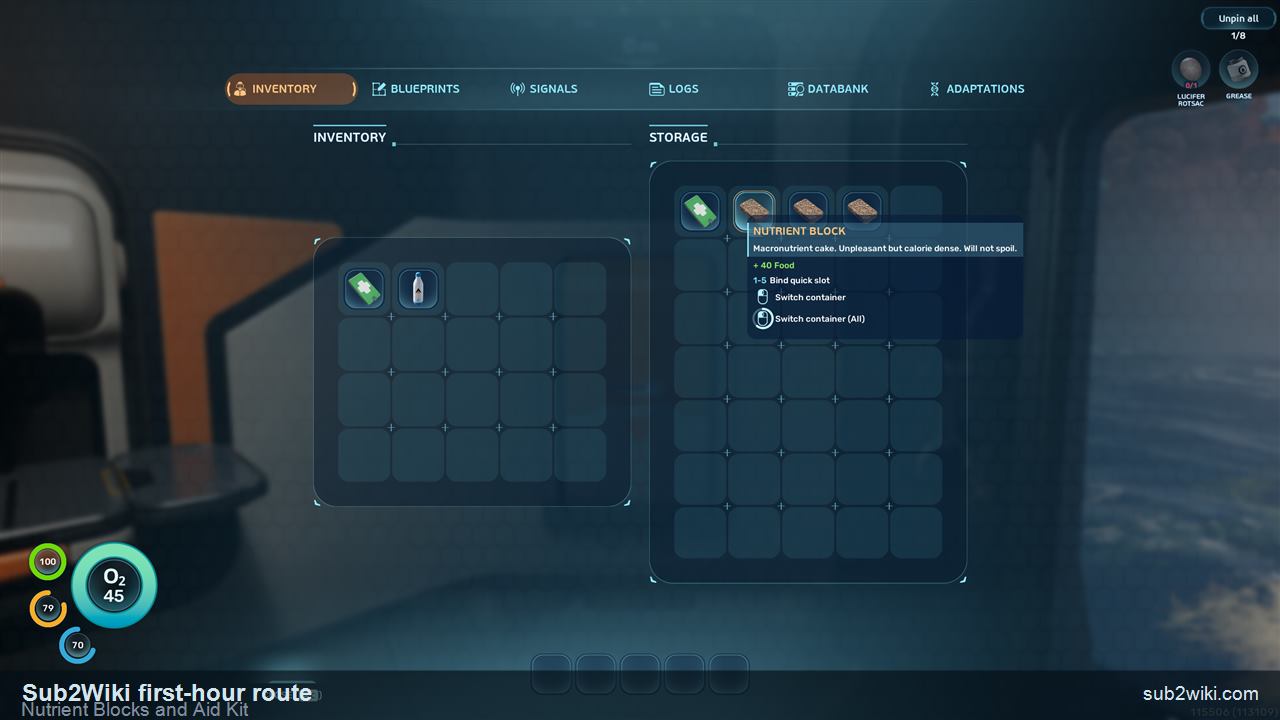
The first locker is worth opening right away. In this route it starts with three Nutrient Blocks and one Aid Kit. Each Nutrient Block restores 40 food, so three blocks are enough to carry you through the first material-gathering phase while the later food and water loop is still locked behind crafting and exploration.
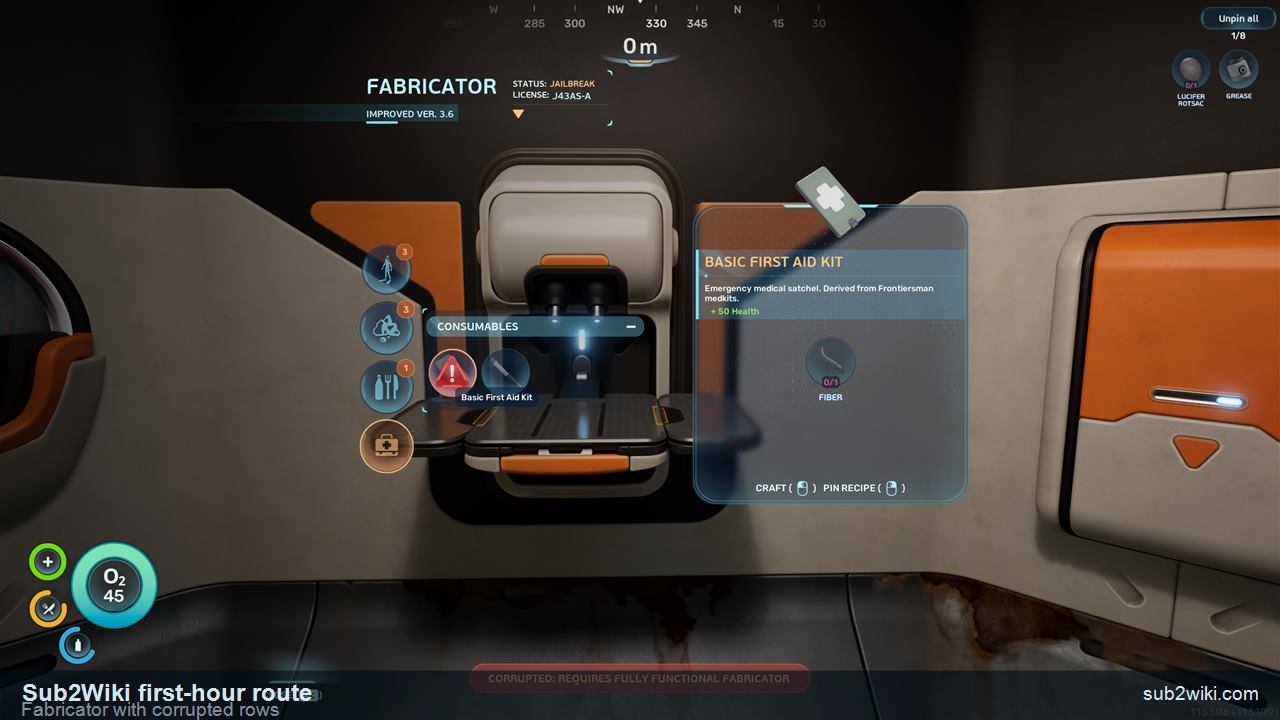
The Fabricator is the center of the first-hour loop: gather nearby resources, come back, craft the basic tools, repeat. If a recipe row has the red exclamation corrupted marker, leave it alone for now. There is a later solution, but it is not the blocker for this first tool pass.
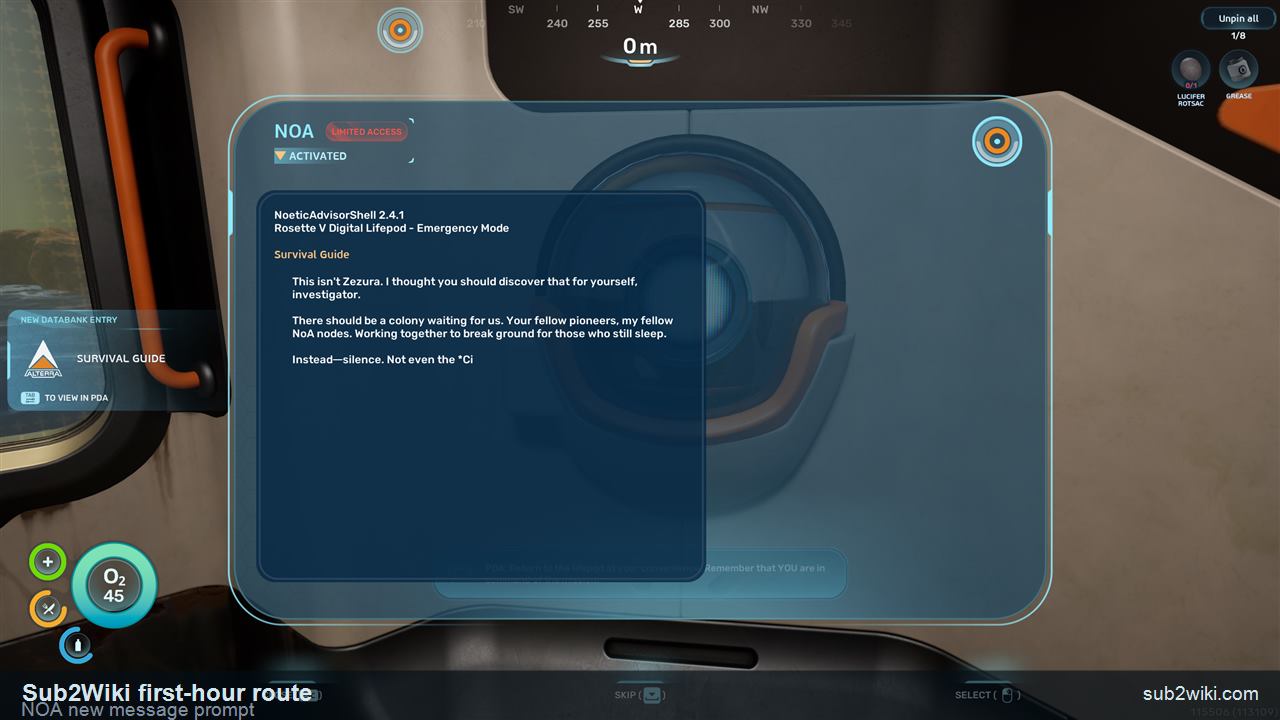
When the HUD or station shows that NOA has a new message, open it promptly. In this route, reading NOA now keeps the mission chain moving so later key coordinates can arrive without you swimming around ahead of the prompts.
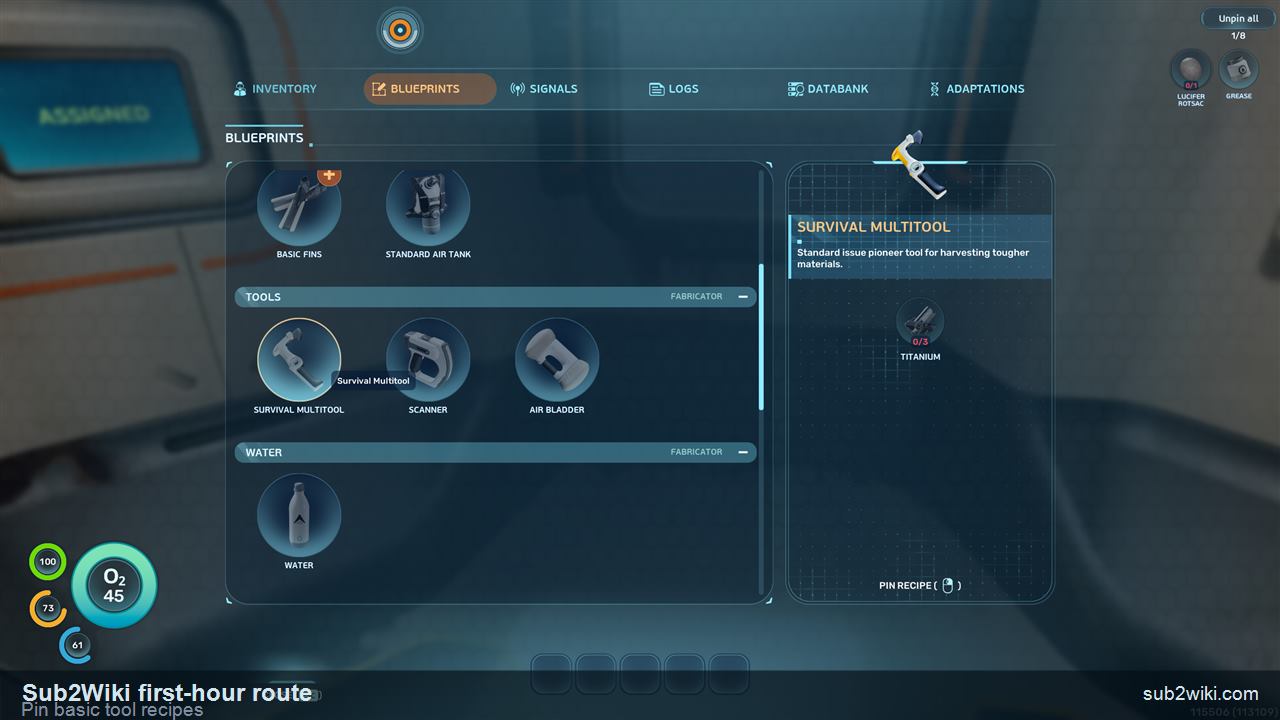
Open the PDA, go to Blueprints, scroll down to the basic tool trio, and right-click the tools you want to craft next. Pinned recipes stay visible in the upper-right corner, which makes the first resource dive much cleaner. Use Unpin later when you want the HUD back.
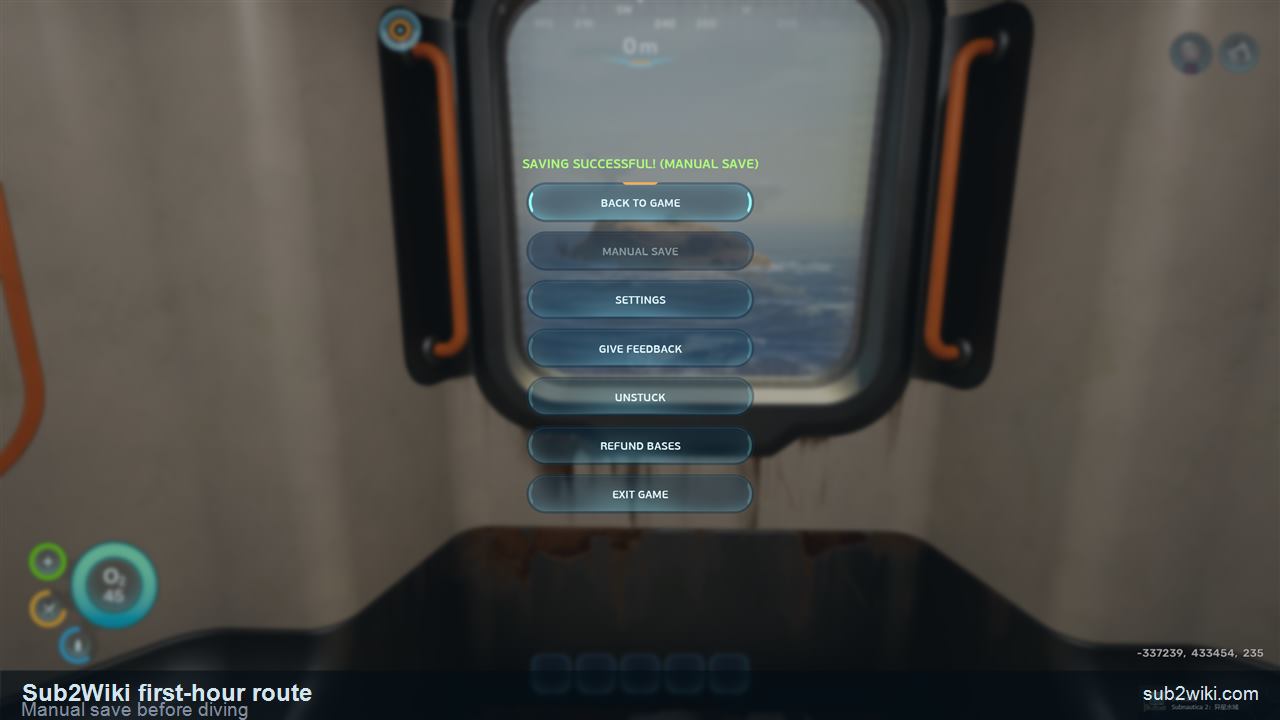
Before each early dive, make a manual save. This is especially useful while you are still learning the local terrain, oxygen timing, and safe return path. Save first, then start the short loop for starter materials.
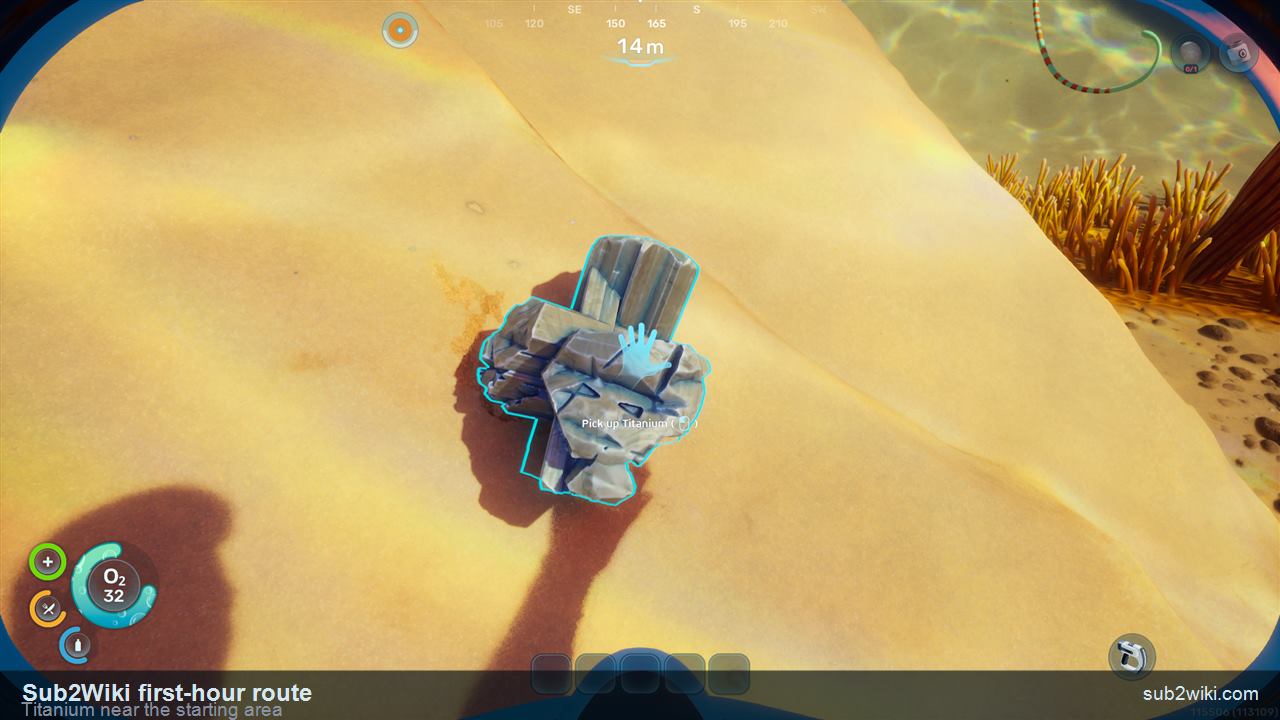
Start with the nearby materials. Titanium and Quartz both appear close to the starting area in this route, so do not swim far just to begin the basic tool chain. Grab what the pinned recipes ask for, surface before oxygen gets uncomfortable, and return to the Fabricator.
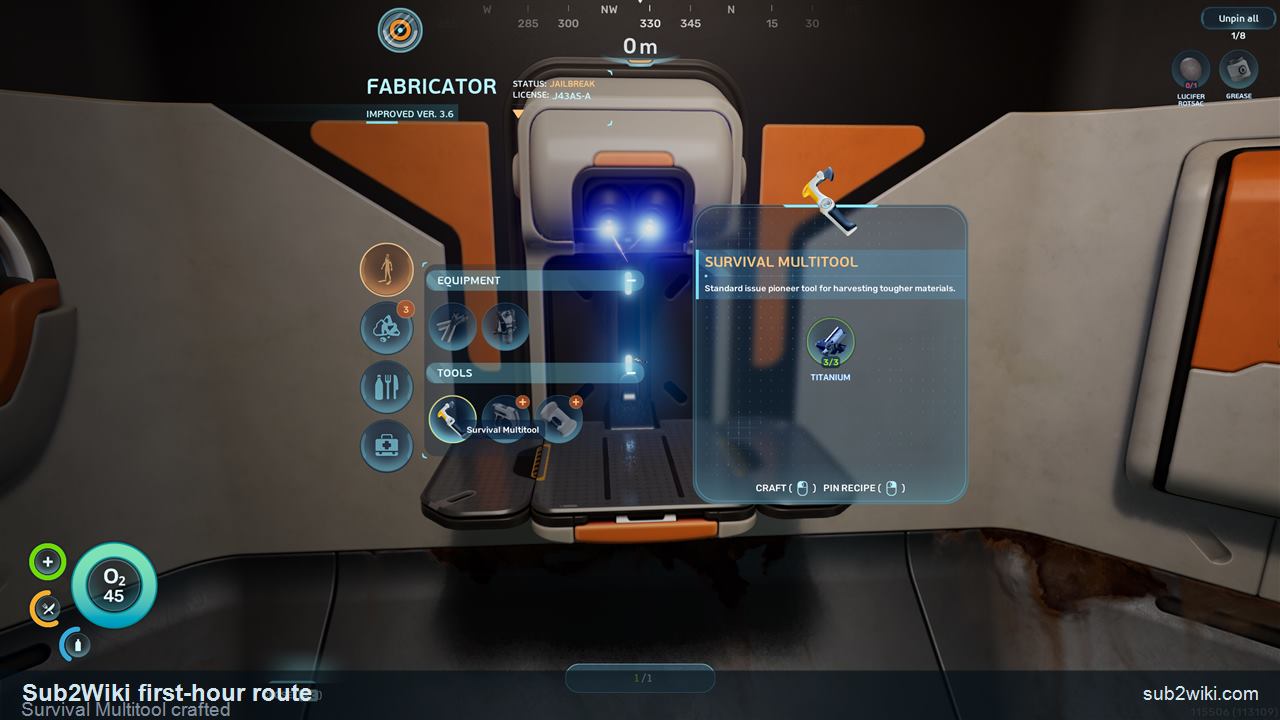
After the short material dive, return to the workbench / Fabricator and craft the Survival Multitool. In this route, the Titanium pickup from the nearby loop is the key material that gets this first tool made. This is the point where the opening stops being only observation and becomes a repeatable gather-craft loop.
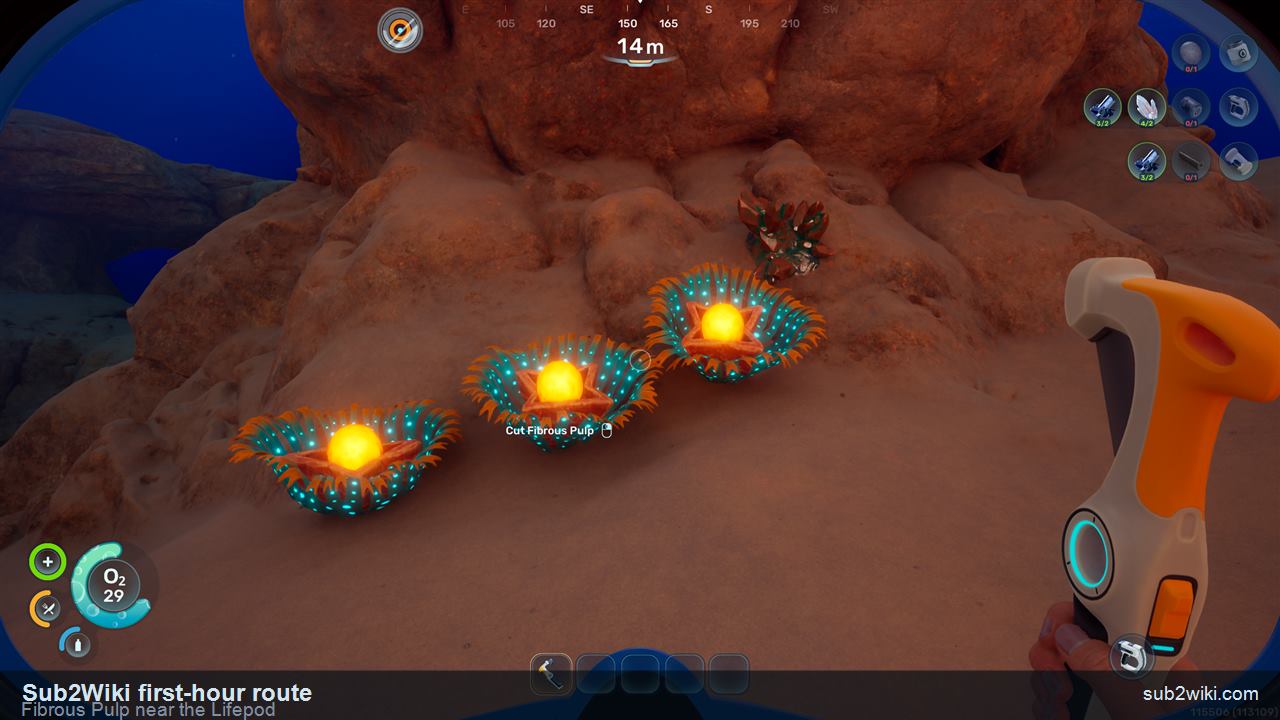
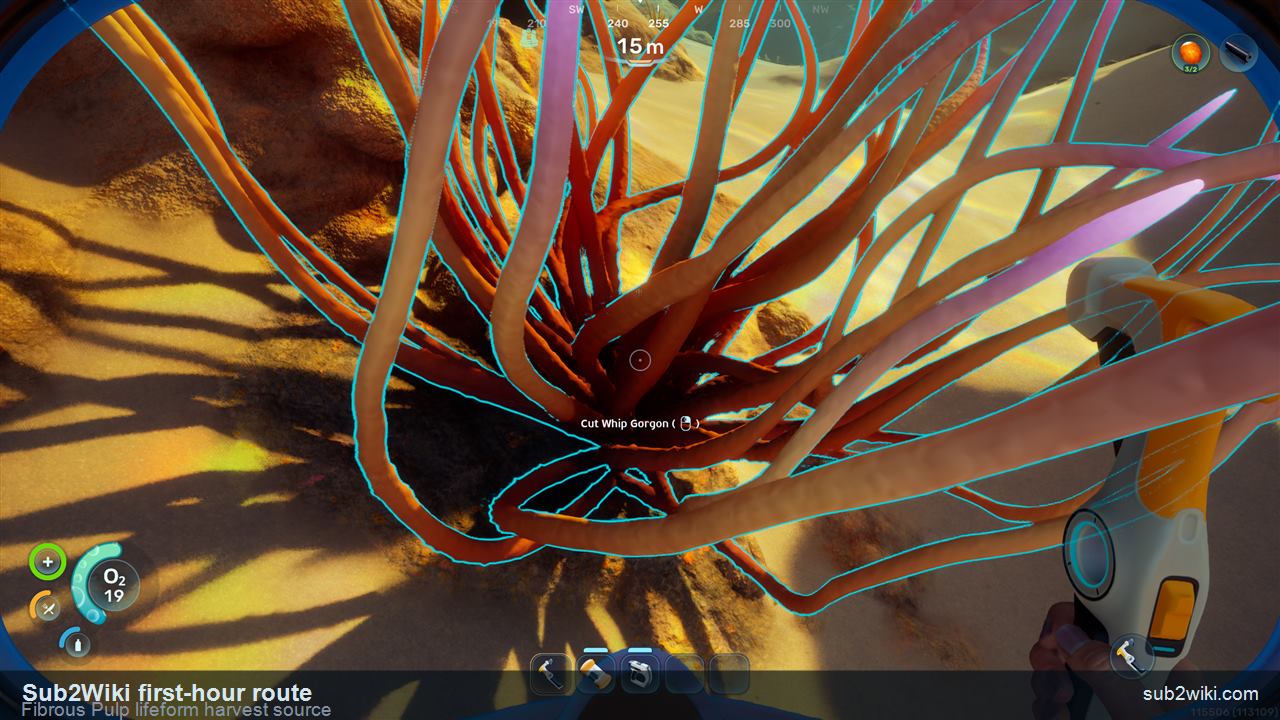
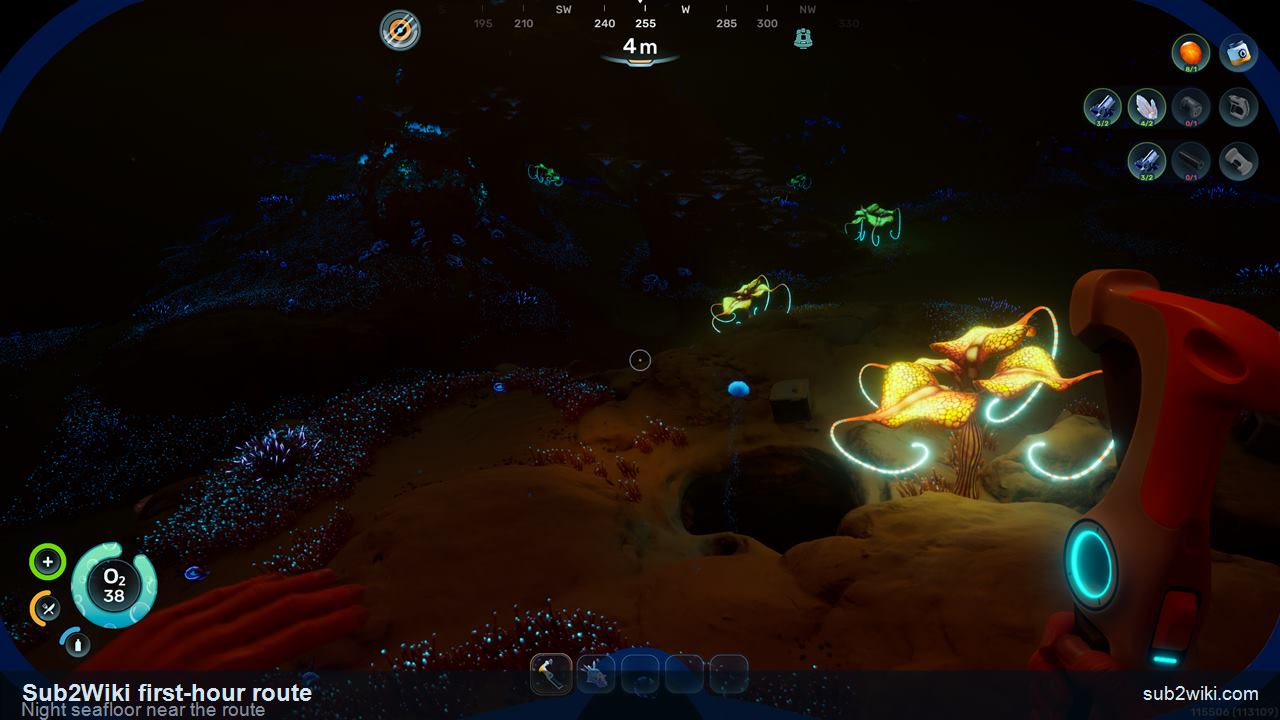
After making the Survival Multitool, keep the next pickup close: Fibrous Pulp can be gathered near the Lifepod in this route. Use the visible HUD coordinates as the practical reference point. A nearby living harvest source can also yield Fibrous Pulp, so check the shallow objects around the same path before turning this into a longer dive. If night arrives, the seafloor is genuinely beautiful, but landmarks get softer, so stay tied to the Lifepod direction and the coordinate readout.

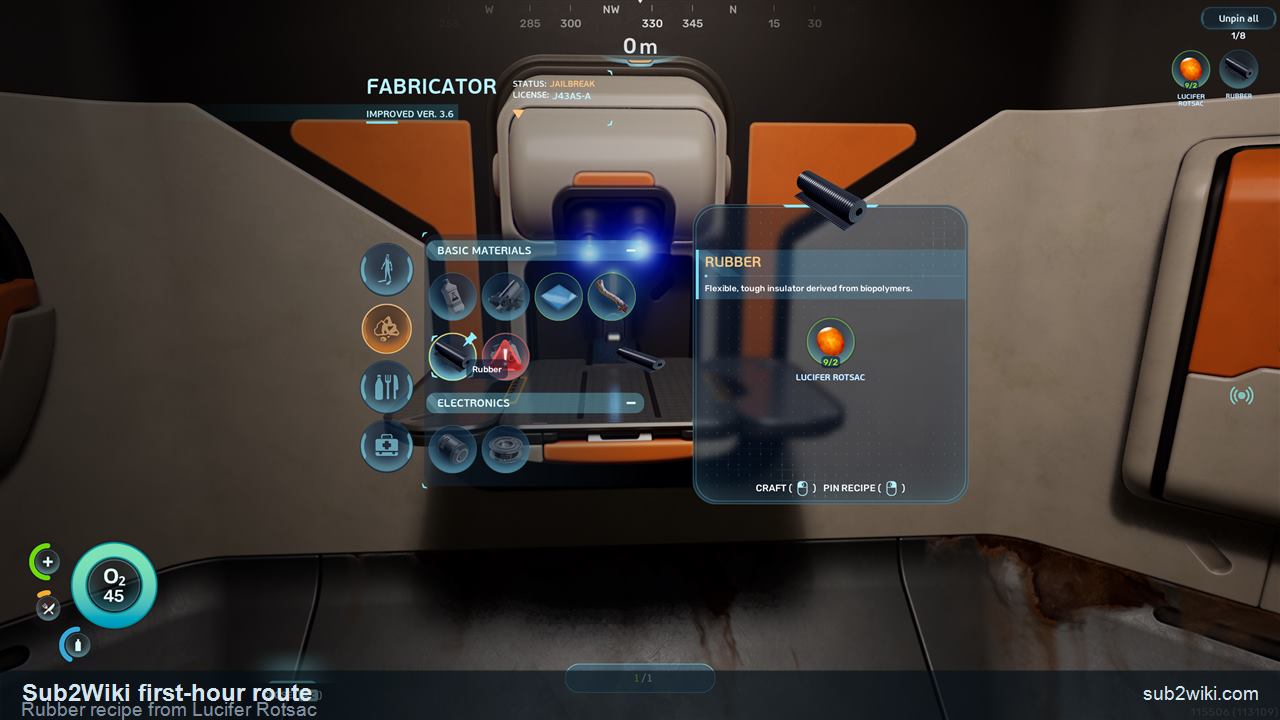
Once the plant pickups are back at the Fabricator, turn the route into movement gear prep. Make Rubber from Lucifer Rotsac and Fiber from Fibrous Pulp before opening the Basic Fins row, so the materials are ready when you need them.
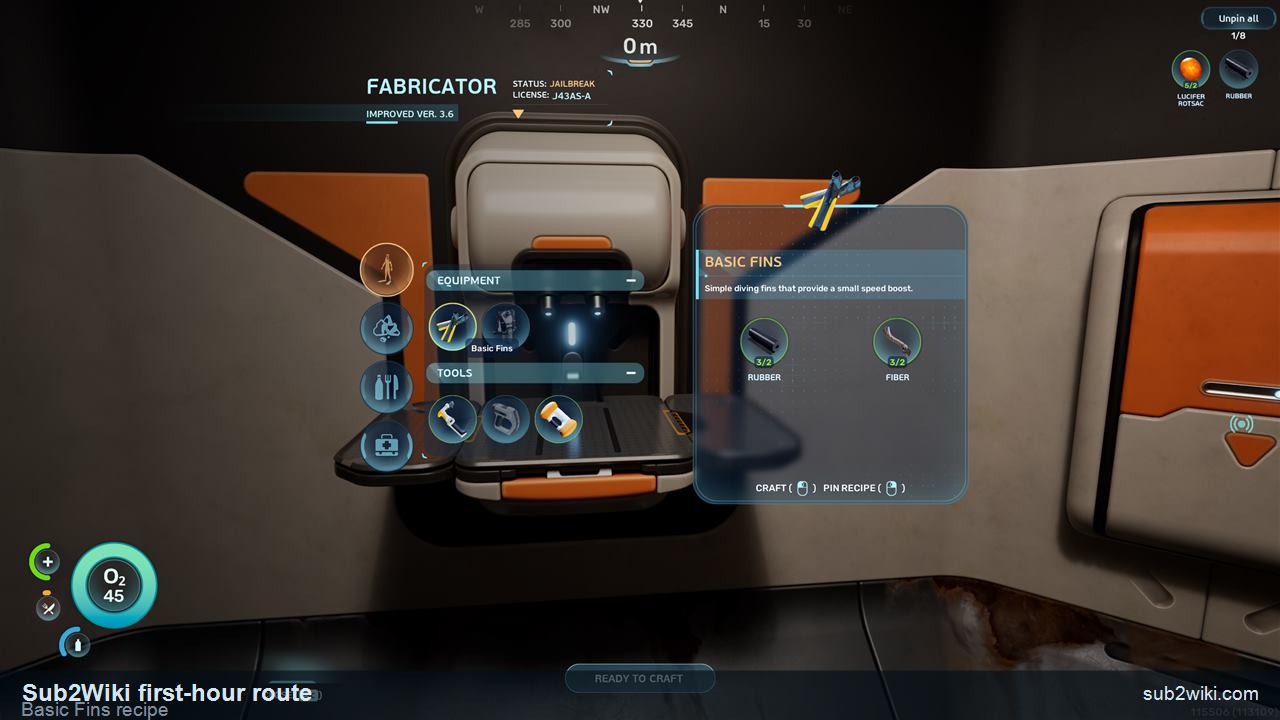
Craft Basic Fins as soon as Rubber and Fiber are ready, then equip them from your inventory. The small speed boost matters immediately because every nearby material return and oxygen loop becomes less punishing.
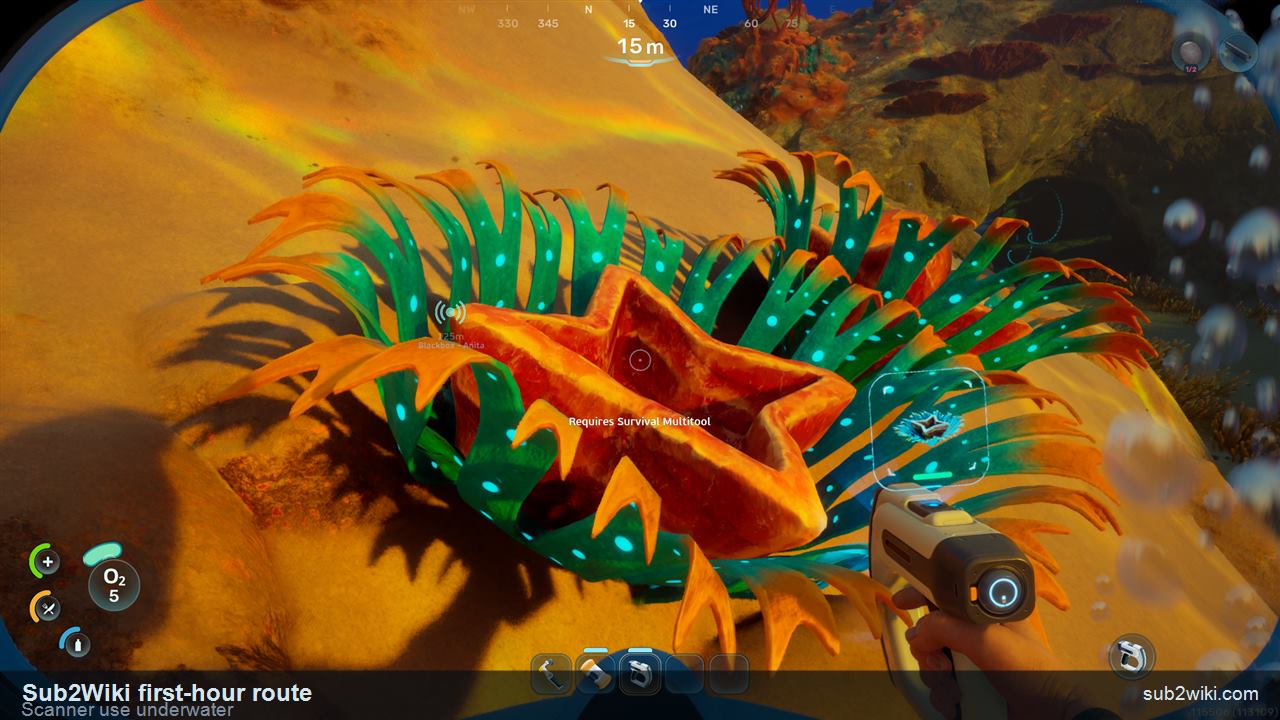
After Basic Fins, keep the next survival loop practical: use the Scanner while you are already underwater, catch a Water Slug, then return to the Fabricator and craft Water. This gives the route an early hydration answer before you start stretching farther from the Lifepod.
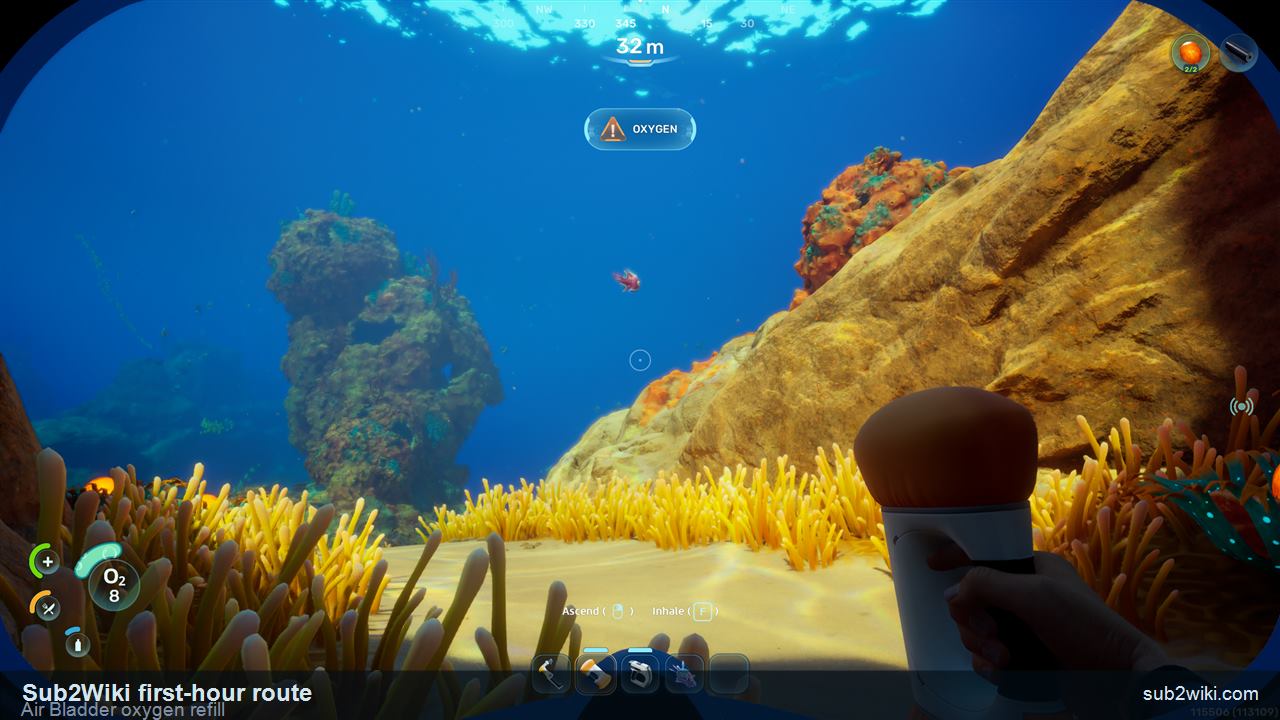
When you are underwater, select the Air Bladder from the hotbar and press F to inhale oxygen from it. Right-click is the fast-ascent action when you need to escape upward. After you surface, the Air Bladder refills its stored oxygen automatically, so the blue Air Bladder bar is a reusable emergency buffer rather than a one-time consumable. Treat this as mistake recovery, not permission to ignore the surface route.
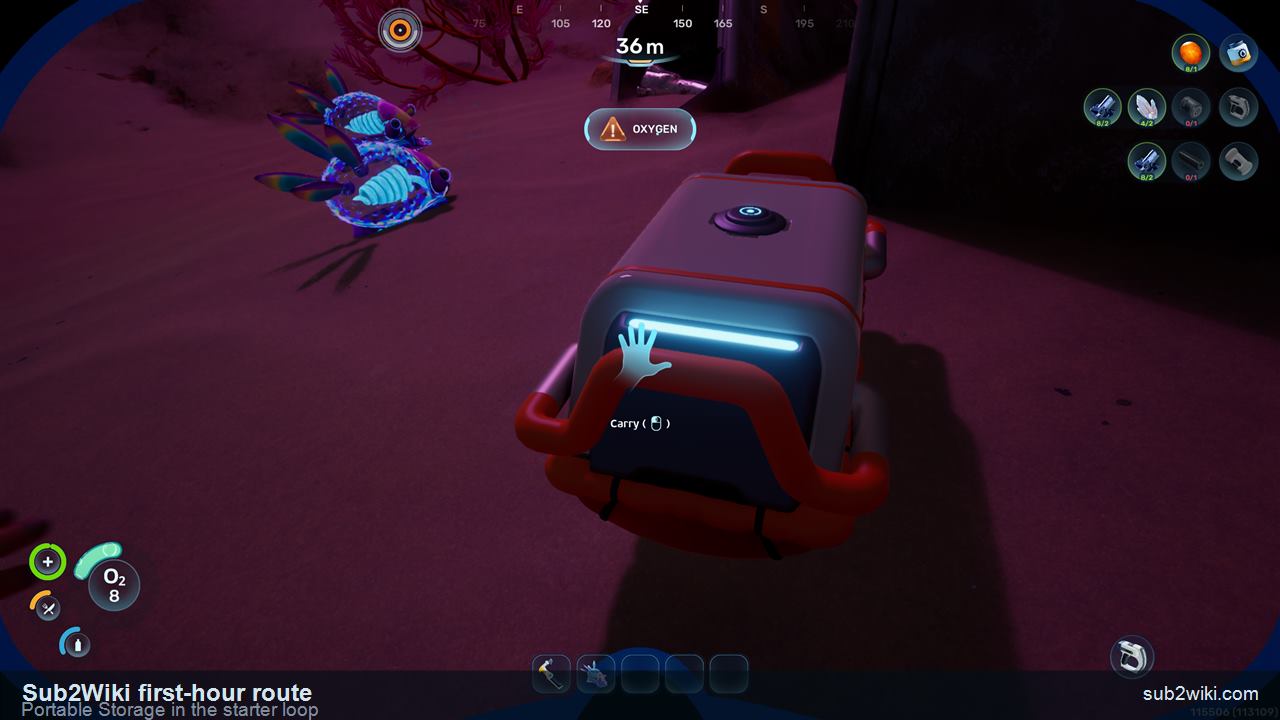
Once the first materials and tools start piling up, make Portable Storage. This is the early answer to the first inventory squeeze: it keeps Titanium, Quartz, battery parts, food, and spare tool ingredients from turning every dive into a sorting problem. Treat it as temporary starter infrastructure, not a final base plan.

Back at the Fabricator, the next useful electronics step is Basic Battery. This route uses Copper and Acidic Raion Pouch for the battery chain, which keeps powered tools from becoming the next blocker.
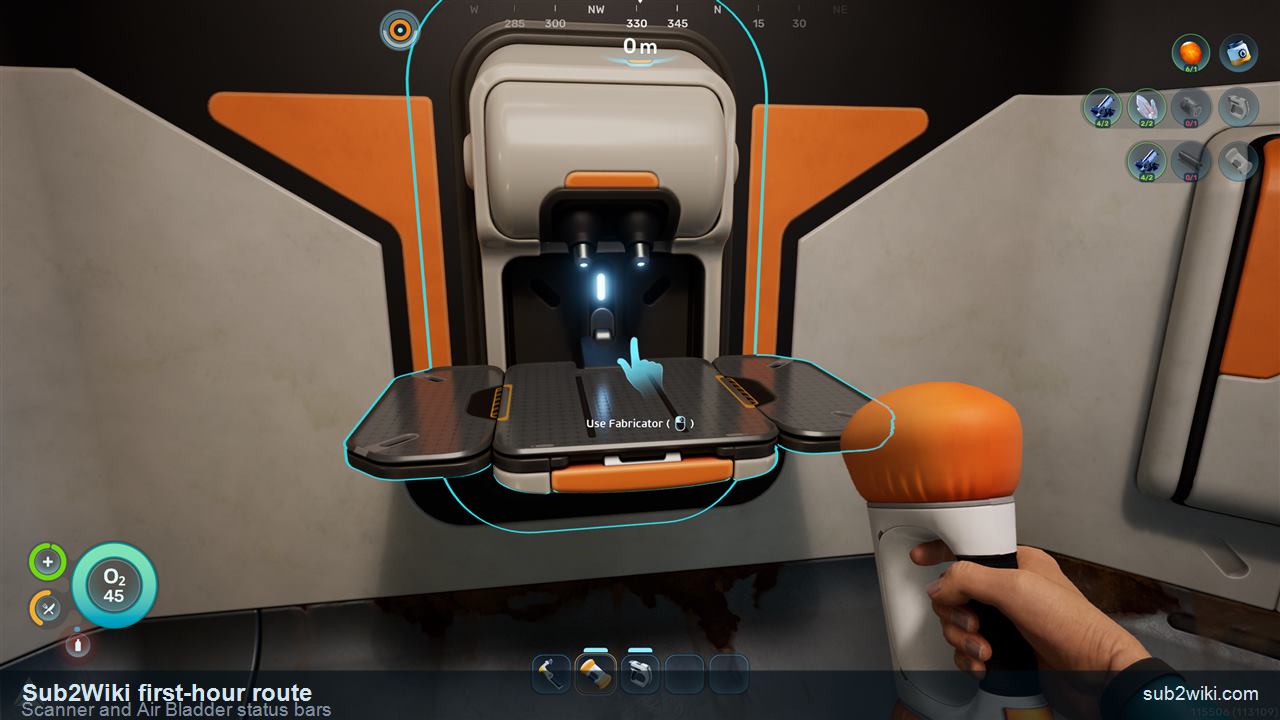
After the extra tools are made, look at the hotbar carefully. The blue bar above the Scanner is its battery charge, not durability. The blue bar above the Air Bladder is its oxygen amount, so it changes as the tool is filled and used. This is an important UI detail because both tools can look "ready" while their blue bars tell a more specific story.
Keep the first loop compact: save, gather, surface, craft, repeat. A clean return route matters more than speed.
One player checks NOA, Fabricator, and recipe pins while the other scouts the nearby Titanium and Quartz spots, then both return before oxygen gets tight.
Split roles early: one on station checks, one on storage, two on short material dives. Regroup before crafting so nobody duplicates the same job.
Do not trust memory too hard. Read the new UI, respect corrupted Fabricator rows, and let pinned Blueprints drive the first material pass.